Easy & Cheap DIY Hardwood King Platform Bed Plans
Thursday, 21 April 2011
My wife recently wanted to “upgrade” from a Queen-size bed to a King. She says she finds them more comfortable to sleep on because she can stretch out. Personally I think she just wanted more room for the dogs.
In either case, after she bought the mattress it was inevitable that a new bed would be needed. So now there were a few choices: 1. Standard foundation vs Platform, and 2. Commercially available frame vs DIY frame.
The first choice was easy as we’ve been using a platform foundation for years and would never go back. In our experience standard box spring foundations not only cost more but also have a short life span, with the box spring often failing and then causing a mattress failure. So a platform foundation it is…
After looking at the outrageous prices asked for commercially available platform beds the second question was fairly easy to answer as well. A decent, sturdy platform in a King-size couldn’t be found for much under $1000. In contrast, I built this bed for about $300 finished, and I think it’s much more stable than the commercial units I looked at. So here’s how you can build your own if you want:
Materials List
To build your bed you will need:
- 3 – 4’x8′ sheets of 1/2″ MDF
- 1 – 4’x8′ sheet of 1/2″ hardwood plywood of choice. We used Birch.
- 3 – 8′ long pieces of 1″x1″ hardwood of choice. We used Maple for all the hardwood. Also note that the actual dimensions will be smaller due to planing.
- 3 – 4′ long pieces of 1″x2″ hardwood of choice.
- 2 – 4′ long pieces of 1″x1″ hardwood of choice.
- 1 – 8′ long piece of 1″x3″ hardwood of choice.
- 1 – 8′ long 2″x4″. Softwood lumber (eg. spruce or pine) will suffice.
- 2 – 8″ long pieces of 1/2″ or 3/4″ quarter round hardwood of choice. The 3/4″ quarter round will need to be notched to fit around the plywood, whereas the 1/2″ won’t cover the cut edge as well. Alternatively you could also cut your own trim from hardwood stock, which is what we did.
- 2 – 4′ long pieces of hardwood trim for the top of the headboard under the cap. We cut some 1/2″x3/4″ stock to cover the joint, but you could use 1/2″ quarter round.
- 100 pcs 3/4″ flat head wood screws, for securing the plywood.
- 32 pcs 1-1/4″ flat head wood screws, for securing softwood brackets to MDF.
- 10 pcs 2-1/2″ long 1/4″ bolts & washers & wingnuts, for securing crossmembers to brackets. Carriage bolts work well
- 8 pcs 2-1/2″ long 1/4″ flat head screws & washers & wingnuts, for securing sides at corner brackets. Note that these must be flathead screws so as to sit flush to the surface of the MDF when countersunk.
- 6 pcs 2″ long 1/4″ bolts & washers & wingnuts, for securing headboard.
- Finishing nails, or brads, for securing hardwood trim.
- Wood glue.
- Finishing materials. We simply applied a polyurethane finish.
Besides the material above you will need a saw or saws for cutting the material, a drill & appropriate bits, a countersink bit for the flathead screws, a couple of clamps, a hammer & punch or a brad nailer, and applicator of choice for the finish.
The PDF drawings of the bed, including a cut list for the plywood and MDF, are attached below.
Building the Bed
To start, cut all of the pieces from the MDF. The thickness of the sides, head, foot, and crossmembers assume a blade thickness of 1/8″ or less. It’s more important that all of these pieces are the same width than that they be exactly 6 7/8″ wide. To ensure a straight cut if you aren’t using a table saw clamp a straight edge to the material so that it’s parallel to the cut line and offset by the width of the piece you want to cut MINUS the distance from the blade to the edge of the edge of the base of the saw, or PLUS this distance PLUS the thickness of your saw blade, to compensate for the cut. In other words, if you clamp on the inside of the cut line you don’t have to compensate for the thickness of the blade, but if you cut on the outside of the cut line you do.
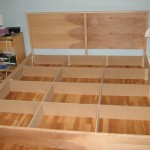
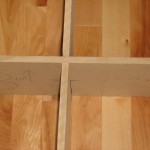
Once all of the pieces have been cut you’ll have to notch the cross members so that the fit together tightly. To do so, you will want to cut a groove about 3 1/2″ or more deep, and a bit more than 1/2″ wide. You want to roughly evenly divide the 3 shorter boards into 3 sections and the 2 longer boards into 4 sections so that the crossmembers are evenly spaced. However, what’s much more important than getting them perfectly evenly spaced is that the cuts are exactly the same distance from the ends of each piece. The simplest way to do so is to clamp the group that’s being cut (either the 3 shorter boards, or the 2 longer boards) together, with their ends lined up evenly, and then cut the pieces together. To guide your saw during the cut, assuming you’re not using a table saw, you might want to use a speed square rested against the base of your saw. Once you have the pieces all cut test that they all fit together freely, without any jamming. Then assemble them on the floor. You should have a lattice of intersecting crossmembers that looks similar to these pictures (minus the headboard, foot, and sides, obviously):
Once you have the crossmembers assembled it’s very important to mark them as to their orientation. Mark each with their position, and if desired mark the direction up. For example, you may mark the long x-members “Left” and “Right”, and the short x-members “Head”, “Middle”, and “Foot”. Once you have the sides attached it will be easy to forget which board goes where, and unless the holes you drill are exactly perfect you won’t be able to align the bolts when you go to reassemble the bed.
Next up, we cut and attach the corner supports to the head and foot of the bed. As shown in the PDF drawings, the MDF head and foot boards sit inside the long side boards. The 2×4 supports are glued & screwed to the corners of the head and foot and then the sides are bolted to these boards. So the first thing to do is to cut 4 pieces 6 7/8″ long of 2″x4″ material. If you have access to a jointer or table saw you may also want to ensure that you have 2 edges that are as close to square to each other as possible, though this isn’t strictly necessary. Next, drill 3 screw holes to accept the 1-1/4″ flathead wood screws at each end of the MDF head & foot boards, and the countersink those holes from what will be the outside of the bed frame so that the head of the screws sit flush with the MDF surface. Apply glue to the narrow side of one of the 2″x4″ pieces and align it with one end of the head piece of MDF and attach it with the 3 screws. Repeat with the other 3 corners. Mark one board as the head and one as the foot to keep track of their location, and mark up for orientation.
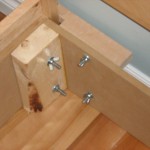
Once you have the corner supports glued you can place the head & foot boards on the ground in the appropriate places relative to the crossmember lattice you already have in place. Take one long side, mark it with it’s location and orientation, and put it in place. Align the corners so that the end of the side is flush with the top of head board. Then drill 2 holes through the side board and the corner supports. Countersink the holes on the outside surface of the side board to accept the 1/4″ flathead screws that will attach the corners. You may also want to go back after and enlarge the holes in the softwood supports so that the screws are easier to align in the holes during assembly. Repeat the process with the other 4 corners. You should now have 4 corners that look like this, minus the trim:
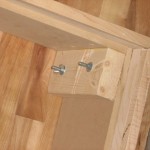
If you want you can glue the screws into the MDF with epoxy, though it’s not necessary. Once the plywood goes on the outside it will keep it in place, and the screw won’t generally spin once you start to tighten it.
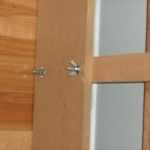
Now you should have on the floor 4 sides clamped around an internal lattice of crossmembers. The next step is to attach those crossmembers to the sides. Cut 5 pieces 6 7/8″ long of the 2×4 material, then cut them in half length-wise. The simplest way to do this is with a table saw, but any saw & guide will work. Next, divide the sides, head, and foot boards into 3 or 4 sections, as you did before when cutting the crossmembers, and mark them. These marks will be the locations of the centers of each crossmember. Again, it’s not critical to be exact. Align one of the ends of a crossmember to the centerline mark on the outside board, glue up a piece of the split 2″x4″, and drill, countersink, and screw it in place with a couple of 1-1/4″ flathead screws. To help you in this step you might want to clamp the piece of 2×4 in place while drilling the holes through the MDF (don’t drill through the support!) and countersinking them. Repeat this process for the other 9 crossmember ends. Then cross-drill each one for a bolt & washer & nut, enlarging the hole in the MDF for easier alignment.
You now have the finished husk of a bed frame! All of the rest of the work is primarily for appearance.
The next step in finishing the project is to cut your plywood. To protect the plywood during cutting select the side that you want to be showing and keep the face of the saw (either the table saw or hand-operated saw) contacting the OTHER side. Note that the dimension for the headboard piece is given as “Approx. 24″, meaning that if it’s a little shorter than that it will still work as the mattress will cover the edge.
Once cut you will want to attach the side and foot pieces to their respective sides and foot. You’ll notice that these boards are wider than the MDF pieces. This is to provide a lip to hold the mattress in place if necessary. Attach the plywood sides to the MDF sides using the 3/4” wood screws in holes drilled & countersunk from inside the frame. DON’T GLUE THESE! You’ll want the plywood to be able to move somewhat relative to the MDF. Also, if your plywood pieces are slightly long or short just ensure that the end at the foot is even with the MDF. The end at the head won’t be noticeable.
For the foot piece you need to align the plywood so that you have an equal amount of overhang on each end. Clamping the piece in place during assembly makes this easy. The idea is that the plywood panel should cover the cut end of the MDF sides. Again, attach with 3/4″ wood screws in predrilled & countersunk holes from the inside of the frame.
Next, attach your trim for the corners at the foot end of the bed. You can use 1/2″ quarter-round moulding, which should sit flush against both of the raw cut ends of the plywood panels. Attach the trim with glue and finish nails or brads to the sides. DON’T ATTACH THEM TO THE FOOT OR YOU WON’T BE ABLE TO REMOVE IT! Alternatively, if you haven’t perfectly cut your edges you can use 3/4″ moulding that you notch as shown in the detail of 1/1.02 of the drawings to cover the cut edge. Or even make your own trim as I did.
After the trim at the footer is finished you’ll need to cut the 3 8′ long pieces of 1″x1″ hardwood to cap the top of the plywood, with 45 degree cuts if you wish at the foot corners. If you have access to a table saw or router table you can groove the hardwood to fit over the cut edge, making it stronger and better covering the edge. Attach with glue and nails/brads. Before finishing the bed frame use a sanding block and some 120 grit sandpaper to knock off the sharp edges on these caps.
The only thing left now is the headboard. This is a fairly simple design. First take the one of the 2 4′ long pieces of 1″x2″ and one of the 2 4′ long pieces of 1″x1″ hardwood and glue them together so that they form an L shape when looking at the profile. See 2/1.02 in the drawings. This is going to form a lip that the plywood will sit in. Make sure that the pieces sit flush to each other on the edge when gluing or you’ll have difficulty getting a nice edge. To hold the pieces together when gluing you could use clamps to hold it, or use brad nails or short screws from the back. Allow the pieces to dry before proceeding.
Next, take the L shaped pieces you’ve made and sand the side where the 2 pieces were glued together until it’s flush. Cut the pieces into 2 legs that about 35 1/4″ long. Then attach the plywood to these 2 legs as illustrated in 2/1.02 of the drawings, with the glued edge facing the sides and the face of the 1″x2″ facing the foot of the bed, and with the end of the leg flush with the top of the plywood sheet. Attach the plywood to the legs with 3/4″ screws countersunk from the back. Again, no glue. Take the extra piece of 1″x2″x4′ hardwood and cut it to 35 1/4″. Mark the center point of the top and bottom of the plywood, use a straight edge to draw a line through the middle of the plywood, and drill & countersink a series of holes to hold the center leg. Attach the leg with the screws so that the top is flush with the top of the plywood.
Next, cut the 1″x3″ hardwood to 79 1/2″, sand or otherwise smooth the ends for appearance, then line this headboard cap up on the top of the headboard. You may need help with this part. The cap should extend 1/2″ past both sides of the headboard. Once you have it aligned attach the cap with glue and nails or brads. Finally, cut the 2 4′ long pieces of trim to fit between the end posts and the center post and attach it with finish nails or brads.
The headboard can attach a couple of ways. The center leg is simple – drill a couple of holes and use bolts & nuts to secure.
But for the outside legs you have 2 options: The first is to simply use wood screws to secure the legs. You can’t fit bolts & nuts because of their location, so regular wood screws would be the next best thing.
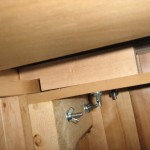
If you want to get fancy, though, you can cut some toe clamps out of extra hardwood that you have lying around. These are essentially a rectangle of hardwood, about 1-1/2″ wide by 6″ long works nicely. Then notch one corner so that you remove about 1″ wide by 5/8″ high piece of material. Then drill a hole about 1-1/2″ in from the other end of the material the long way through the hardwood. You may also have to countersink this hole unless you have exceptionally long screws available. Then drill a matching hole to this bolt in the MDF and attach with a washer & wingnut. As you tighten down on the nut the toe clamp pulls the leg in against the bed frame. Works like a charm!
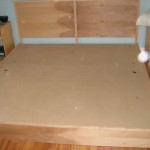
Now put the 2 platform sections on top of the bed frame and you’ve got your platform bed frame completed! All that’s left to do is to apply a suitable finish of your choice!
